Base stats:
– BTU: 10,500 (White gas)
– Weight: 12.3 oz min, 15.9 oz packed
– Stove comparison review
The skinny: An evolution of the original Omnifuel, more refined, more precision focused, with a detail oriented addition of features, while still remaining rugged and reliable.
Caution: There was an issue with an earlier version of the OmniFuel 2 stove. See photos in addendum A at the end of this review. (damaged omnifuel photos courtesy of BC).
NOTE: This appears to have been fixed with the current version. See comment from Scott Boyce on Feb 22nd, 2017 in the comments section.
It’s lighter, has made improvements on minor issues with the original, and kept all the things great about the original, except in one minor aspect: that lightness comes with just a little shaving of the thickness of the pot stand/legs.
It is still very rugged. Certainly tougher than the OmniLite, but the pot stand does have just a little more torsional give than the pot stand legs of the original.

Starting at the pump, nothing has changed. The pump is the same awesome ergopump used in all other Primus liquid fuel stoves and I’m deeply gratified for this. The pump line and fuel intake are both still mostly metal, the pump handle has the same smooth action, they have kept throttles off the pump (great to avoid worrying about it opening while in the pack), and the screw threads are angled to ensure the fuel intake goes to the inside wall of the bottle.
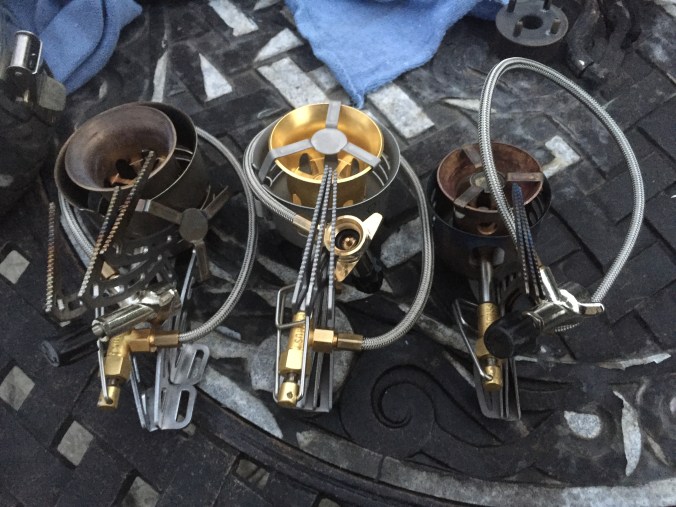
(Left to right: Omnifuel, Omnifuel II, Omnilite)
Next up is the fuel line. Again here, it appears as though nothing has changed. The secondary throttle and fuel rod is also identical. The fuel rod is connected directly to the firewall/fire ring/flame spreader. And that wall seems about the same as the Original, with the same heat collecting base.

The pot stand/legs and the outer heat shield are very new.


Omnifuel II on left, Omnifuel on right, notice the larger gap in the original Omnifuel’s heat shield cutout for the fuel rod.
The heat shield seems now slightly thinner, and has form fitting cutouts for the fuel rod, so there isn’t any movement. This is a real improvement. The previous heat shield had a larger cutout allowing the firewall and fuel rod to jiggle a bit. Over time, this loosens the base screw. Not a big deal but it was necessary to tighten that base screw pretty regularly. The form fitting cutout means the fuel rod cannot really move so there is no jiggling over time, which in turn keeps the base screw from loosening.
 Original Omnifuel
The original also uses a key ring to keep the flame spreader from getting lost. The tiny annoyance was that when removing flame spreader, it hooked in a little making it a bit finnicky to remove it.most folks just bent out the hooks a bit to make the flame spreader easier to remove.


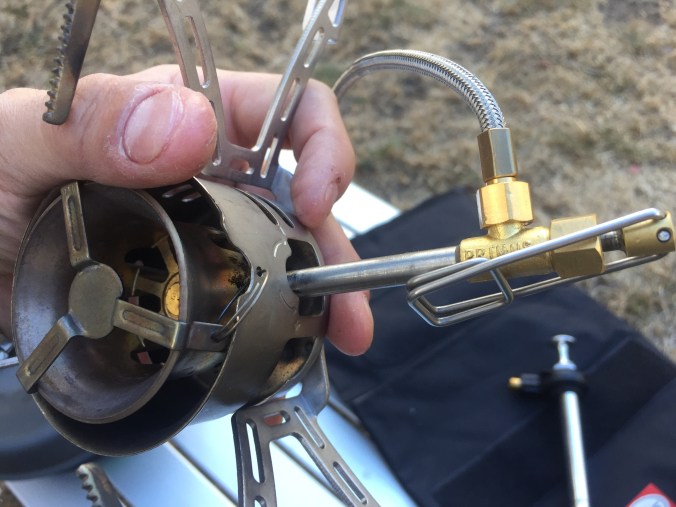
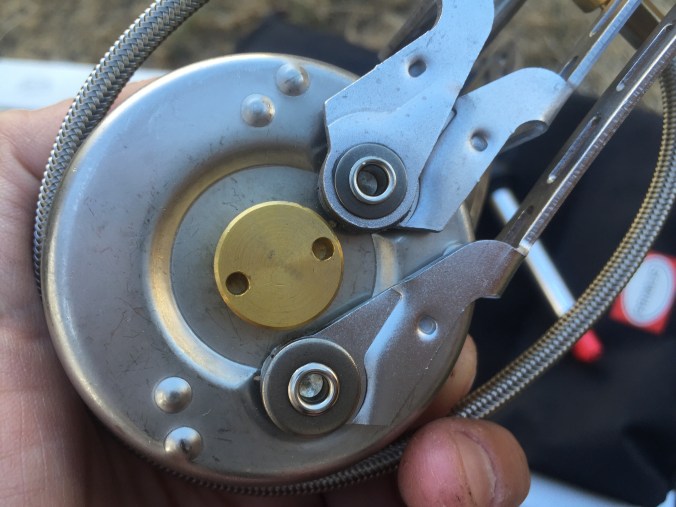
Omnifuel II (flame spreader)
The new Omnifuel uses a coil spring to hold the flame spreader taught. Two of the flame spreader hooks bend sharply hooking onto the firewall very well. The third hook is actually angled wide, away from the firewall wall and pulled tight with the coiled spring to secure the flame spreader in place. This is a very minor change but quite welcome.
NOTE: First version of OmniFuel 2 stove had a design flaw with the splash guard/flame spreader pictured above. See Addendum A at the end of this review. (Photos of damaged omnifuel courtesy of BC). This appears to have been fixed with an updated version of the OmniFuel 2 by loosening the tension of the spring. (see comment from Scott Boyce on Feb 22nd 2017, in the comments section below)

The heat shield also has an imprint of the bolt descriptions in case you forget what each jet bolt (nozzle, nipple) is for. They also added dots to make the jet bolts easier to identify. One dot for LPG, two dots for white gas/unleaded, and three dots for kerosene, diesel, jet fuel.

The legs have changed significantly. The result of the change is roughly the same diameter when opened up (compared to the original),
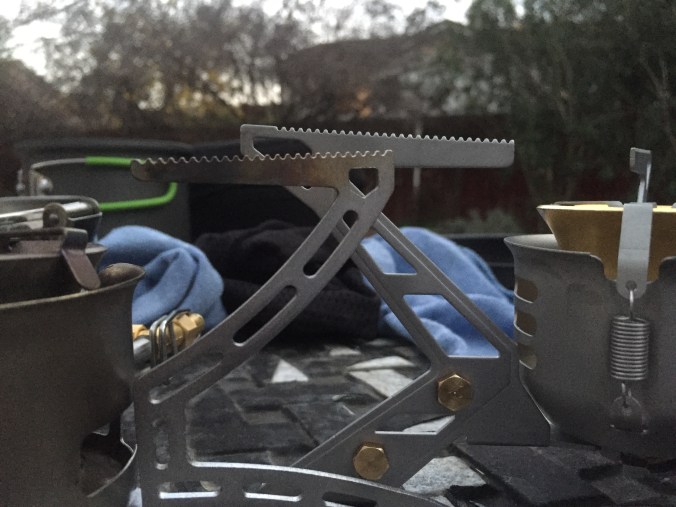
but when folded, the overall length seems a little shorter and when opened it is just a wee bit taller.
 Original Omnifuel on left, Omnifuel II on right
As mentioned before, the pot stand legs are just a hair thinner than the previous version. This makes them significantly lighter but also a wee bit more bendy. Still significantly thicker than the Omnilite pot stand legs.
The way the legs open and close has also been changed.
 Original Omnifuel
The original omnifuel has two pivot screws, one for two of the legs, and a second pivot screw for the third leg.


The Onnifuel II pivots around the central base screw, similarly to the Omnilite. Additionally, the “lock open” mechanism has been changed.


It’s a more secure spring lock mechanism, that keeps all three legs locked innplace much more securely.


Unlocking now requires pushing in the spring lock to pivot the legs closed.
Is this different? Certainly. Is it better? Time will tell. I can imagine sand getting into the mechanism and causing more annoyance but in clean environments, I’m sure it would be fine.


The leg also now holds the spare jet bolts (a.k.a. nozzle, nipple). Presumably so you don’t lose them, though, they don’t screw in particularly tight.
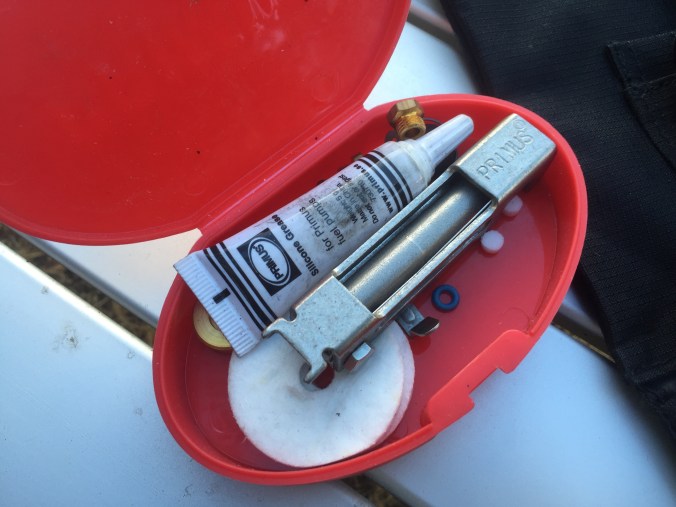
The photo above shows a separately purchased kit, but the tool you see in this kit is the same as the one that comes with the Omnifuel II. The grease tube is also the same. The multi-tool is the same as the Omnifuel and Omnilite. Nothing new.

In terms of function, they are identical. Stoves based on fuel rod and firewall heat concentrators (like the Omnifuel, Onnilite, Nova, and Polaris Optifuel), generally seem to take just a shade longer to prime than generator coil based liquid fuel stoves, and the Omnifuel II seems similar. I tried white gas, and as is typical, with a very slight breeze, it took over a minute to prime the stove. I could be wrong, but it does feel that way. Despite that, I tend to prefer these types of stoves over generator coils, which are made from soft metals, making me nervous for failures in the field.
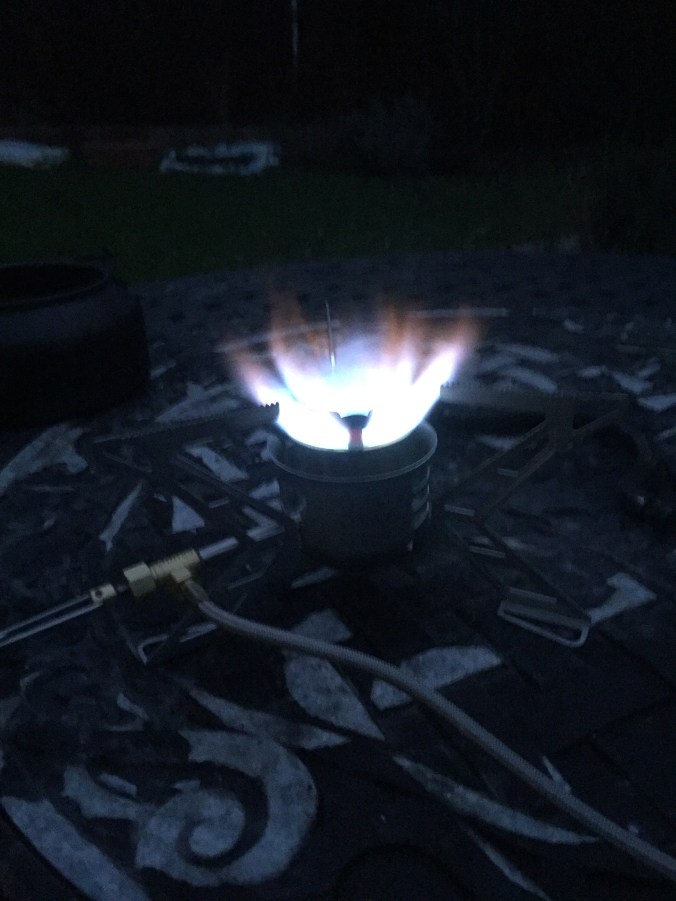
Once the flame gets going, it is nice and blue, but the flame spreads much wider than original Omnifuel, and does have orang’ish tips especially at full blast.
Having said that, it’s reasonable to assume the fuel efficiency should be roughly the same as the original Omnifuel, as the btu measure and the jet bolt gauges are the same. I haven’t done a carefully measured fuel bottle test but it definitely sips fuel faster than the OmniLite and seems about the same as the original Omnifuel in about an hour’s testing of the stoves side by side.
The precision simmering capability hasn’t changed much, it’s still amazing. This second generation is, as is the first generation, a stove designed for real cooking, not just quick boils.
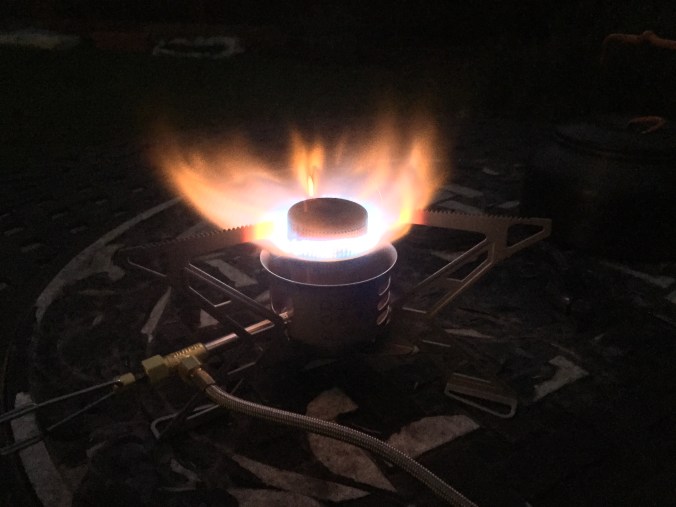
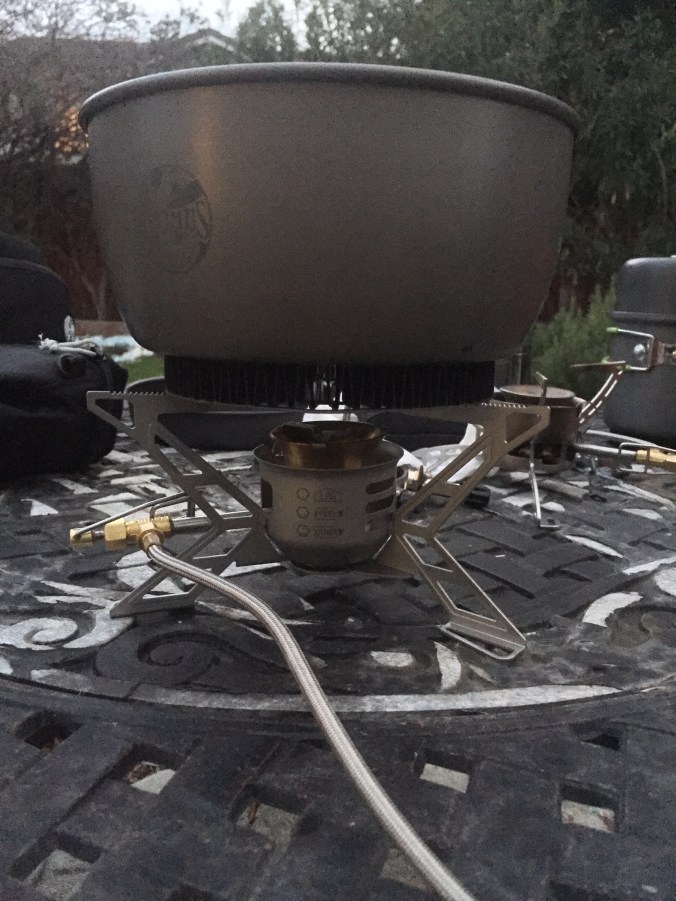
Incidentally, here it is with the Silent burner (meant for the original Omnifuel. Still works, though not quite as effectively as with the original)
—
So what’s a good cook set combination for this stove?


The Omnifuel II fits inside the Optimus HE Weekend. While it fits inside without an issue, the two aren’t a good match. the Optimus HE Weekend is good for very simple meals, and frankly the Omnifuel is designed for wider pots and pans and more involved cooking. They work together fine, but the Omnilite and Edelrid Hexon are better fits for this pot.


The Snow Peak Trek Combo works will with this stove, but again, it’s almost too much stove for this pot set.


The Snow Peak Multi-Compact cookset is a challenge for most liquid fuels stoves, and it’s no different here. The Omnifuel II doesn’t fit inside the smaller pot, but it does, sort of but not quite, fit inside the large one. If you planned on camping with just one pot and pan set, and left the smaller one at home, this could work. I’m not a huge fan of the form factor of the Multi-Compact, and believe in a lower and wider pot, but this is starting to get there.


The Omnifuel II doesn’t fit inside the Toaks 1300ml pot, but it fits inside the 1600ml pot. One pot and pan is just fine by me, so leaving the 1300 behind and just bringing the 1600 would work well for me. Now we’re starting to get into pots designed for more cooking. the pan is also pretty large, so it makes sense to do simmer level cooking.


One of my favorite pots is the MSR Alpine Stowaway 1.1L and 1.6L. They are both low and wide pots. The lids are raised, not flat like some camping pots, and those raised lids add just enough height internally for the Omnifuel and Omnifuel II to fit inside. The center image shows the Omnifuel II in the 1.1L pot. The 1.6L pot has plenty of room to spare. On either side are photos showing the respective pots on the Omnifuel.
The only problem with this setup is that if you go this route, all you have is one pot to work with. There’s no pan for a lid, and you’d have to clean it if you wanted to boil up some water before cleaning the pot after use.
So….with most other pot and pan sets, I would bring just a plastic thermal cup, but when bringing the Alpine Stowaway, I also bring the GSI Halulite, because you can boil water right in the GSI Halulite, and then slip it into the cozy sleeve, add the silicone top, and have a nice warm beverage without burning your hands or worrying that the drink would cool too fast.


The ultimate setup for the Omnifuel II is undoubtedly the Optimus HE Cook set. This set has the pan, pot with heat exchanger, pot with non-stick coating, and a warming cozy. It cooks for three people easy, and four if they are reasonably light eaters. the important thing is to keep the stove well wrapped to avoid scratching the non-stick coated pan. If planning a trip for 3-4 people, I’d probably bring this setup, and have someone else carry the food.
For the Optimus HE cook set, I use the heat-exchanger pot only for boiling water, nothing else. I use the non-stick pot for simmering and cooking, and the pan for frying.
—
So, in the end, how does this compare to other stoves?
Good question. I don’t know yet.
The answer will come as it always does: On my next backpacking trip. What will I instinctively grab? Will it be the Omnifuel II? If I plan to cook on the trail, probably. We’ll see.
Generally, I’ve leaned towards the original Omnifuel or the Polaris Optifuel when wanting something to depend on, The MSR XGK when wanted something that will just work, every time without fail (with a spare pump because the MSR pumps are fragile), the Whisperlite when I plan on using dirty fuels (basically an XGK that is a tad easier to sort of “simmer” with a little finagling), the Omnilite when wanting to make the fuel stretch as much as possible (the Omnilite is the endurance runner of liquid fuel stoves), the JetBoil when going as light as possible, and a Trangia based setup when going for just an overnighter (fuel gulper, but quiet, easy, and environmentally safe).
But more and more, I think I might lean towards the Omnifuel 2. It’s lighter than the Omnifuel, can simmer extremely well, has some great features, and I’ll worry less about losing the jet bolts.
—
Other reviews around the web:
- http://thenextchallenge.org/liquid-multi-fuel-stoves/#omnifuel
- http://classiccampstoves.com/threads/primus-omnifuel-2.30496/
- http://www.mec.ca/product/5043-078/primus-omnifuel-ii-stove/
- http://expeditionportal.com/field-tested-primus-omnifuel-stove/
—
COOKING TEST:
Just for fun (I don’t usually do this in reviews), I figured I’d show off the simmering prowess of this stove.
The Omnilite, Omnifuel, and Omnifuel II are all incredible simmering stoves, which makes them ideal for non-stick coated pots and pans.
To show this off, here’s a test noodle curry, with just four core components:
- Curry concentrate
- Water
- Bacon
- Onion
My goal in this test was to minimize dirty dishes, keeping things as clean as possible.
Also, while this is no where near ultralight backpacking…and is more like super heavy backpacking, I still wanted to use just the gear that I’ve taken on backpacking trips before, so here’s what I used:


- GSI macro table (Yep, super heavy table for backpacking, but fits nicely in the Tatonka Lastenkraxe, and I take it on Emigrant Wilderness weekend trips fairly often….crazy, I know).
- Optimus HE Cook Set. While pretty large, it comes often on weekend trips as there are usually 3-4 people in my group.
- Liquid fuel stove (in this case, the Primus Omnifuel II, but could be any)
- Windscreen 9.5″. This goes on every backpacking trip, regardless of stove.
- GSI kitchen cook kit. This has most of the tools and condiments that I need, and works well with non-stick coated cook sets. Best of all, it has plastic tongs.
- Kuhl silicone pot gripper. The Optimus HE cook set comes with a pot gripper, and it does have some silicone dots to help mitigate scratching non-stick cookware, but if you’re clutsy like, those dots aren’t enough. The Kuhl silicone pot gripper is full sized silicone. While it’s ridiculously large for backpacking, this is a must have in my book if you use non-stick coated cookware.
- folding water bucket.
- rags
- tiny steel knife (could have been the leatherman)
So here goes:
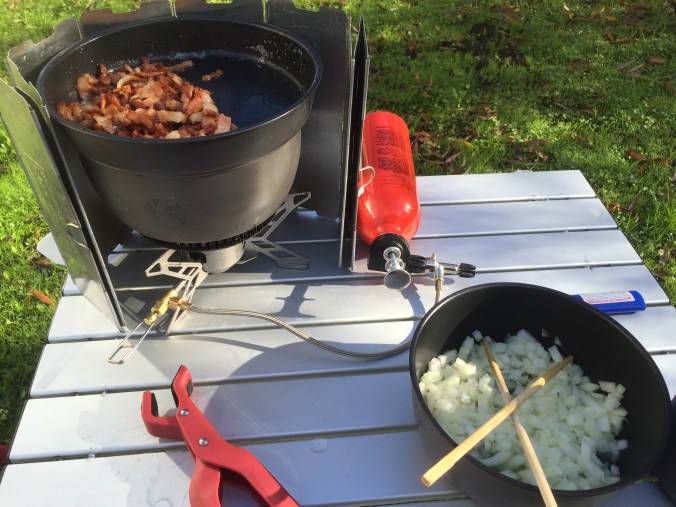
Starting with cutting up the onion and bacon.


Prime the stove:

First up, cook the bacon in the frying pan. Keep the flame nice and low to keep anything from burning. As the oil builds, pour the excess into the non-stick sauce pan with the chopped onions.


Oh….time for a break. Boil up some water for a little instant coffee to keep warm.
Next up, fry up the onions with the oil from the bacon. As with the bacon, keep simmering at a very low heat, this keeps food from burning into the non-stick coating. Takes longer to cook, but well worth it to make the non-stick coating last for as many uses as possible.
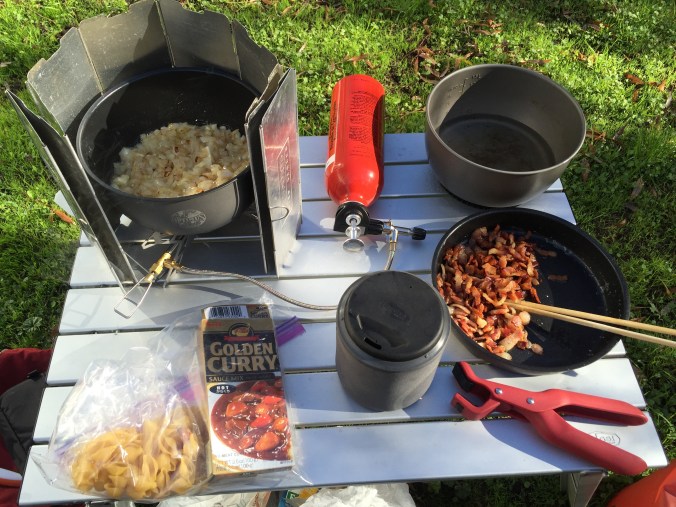
Then, get the noodles ready.
and then get the curry concentrate going in water.
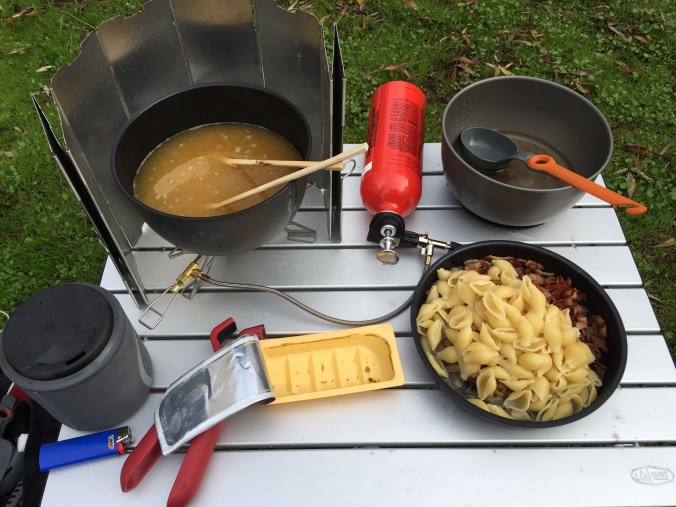
After that, throw it all together.


And tadaaaaaa! noodle curry (^-^).
Probably would have been better with cut up carrots and potatoes, or maybe some celery, but still plenty good.
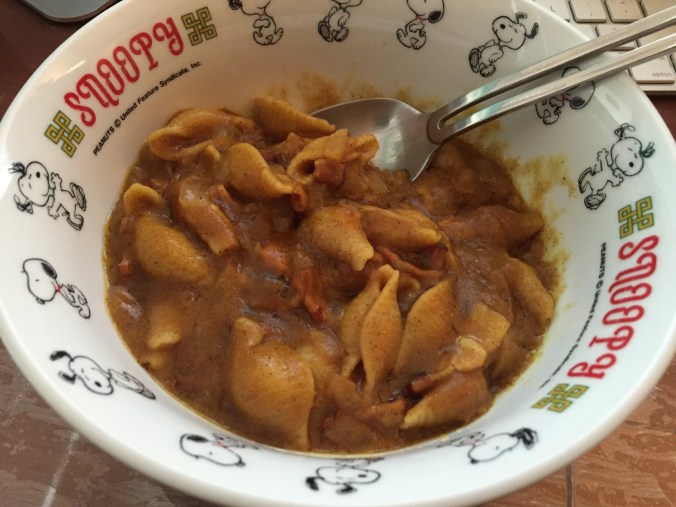
Okay, the Snoopy bowl and metal silverware isn’t backpacking gear, but, other than that, pretty good little experiment.
—–
ADDENDUM: DESIGN FLAW WITH FIRST VERSION OF OmniFuel 2.
NOTE: This seems to have been fixed with latest version of OmniFuel 2 by decreasing the tension of the spring.
If you look in the comments section, reader BC has been kind enough to send photos of a design flaw he discovered. This design flaw escaped my notice as, apart from initial testing, all my stove usage utilized the QuietStove stove silencer/muter.
The design flaw exists because of the splash guard. In the previous generation splash guard, the three tines all applied the same level of pressure to the rim of the copper bell.
This capping method makes the splashguard difficult to remove for maintenance.
The Omnifuel 2 looked to resolve this through a unique spring system, where two of the tines hook on the copper bell, and the third tine is pulled away through a spring.
Under normal operation, as the stove heats the copper bell, and the metal softens, the bell rim begins to warp towards that third tine.
While a little bit of warping is normal, this unique setup causes the warping to become excessive and eventually unusable.
With BC’s permission, I’m including the photos here in this review:


Pingback: Optimus Terra HE 3 piece cookset Review | Camping Stoves and Other Gear Reviews
Great Review! Picking the right stove is now easy for me.
I have an old but tough Primus Omnifuel.
LikeLiked by 2 people
Thank you! Glad you found the review interesting.
LikeLike
Great review thanks a lot
LikeLike
Glad you liked it. Thank you.
LikeLike
Thanks for sharing!
I just got my Primus Omnifuel 2, it’s my first liquid stove, I try several times cooking. Everything is well, just two problems make me quite confused. Hope could help, thx!
1. After the first burned, about 40 mins. The copper burner a little bit deformed, I think is caused by the spreader spring. After the copper burner burned soft, spreader spring force the burner deformated… …now it could not call a circular, just look like a strawbelly.
I notice other people’s stove seems also had this situation. Ehhh, mine is worst.
But I did not observe any difference about the burning situation , I keep on use a few times — cooking rice, dry baking bannock, nothing is unusual.
Do you think that is normal?
2. The asbestos under copper burner. I used the stove three or four times, disassembling the second time it crushed.
Ye, every part of the Omnifuel 2 is durable, except this stuff. As far as I know, usually the asbestos at high temperature once time, it’ll becomes very fragile. Then, those harmful dust will go everywhere.
So I did not find another asbestos instead, I keep on use the stove a few times and I found that the function is still nothing difference …….. the same burning performance, normal preheating.
Will this be a negligence of Primus? Or Primus is too conservative? I think that the asbestos are not make too much difference for using. Of course have it should be a better preheat.
If it is really necessary, I think I’ll find a SS / titanium net instead. Just like the MSR Whisperlite, will this feasible?
Thanks for reading! Hope reply!
LikeLiked by 1 person
Hello BC, I’m currently traveling so can’t review my Omnifuel 2 while reading your comment to confirm. Will take a look at my Omnifuel 2 as soon as I get home. I’m surprised to read the results you have had as I’ve used mine 9 times now, totaling maybe 14-15 hours total run time and have not noticed any deformities. But, I also use the Omnifuel 2 only when i want to cook (which is mostly fine-tuned simmering), so it is possible that I’m not running the Omnifuel hot enough to achieve deformity.
Will update as soon as I get back and have a weekend to experiment.
LikeLike
BC – On the Classic Camp Stoves forum the deformed burner bell was discussed in detail with relation to the original Omnifuel. Bottom line is that it won’t affect performance.
http://classiccampstoves.com/threads/omnifuel-deformation.18534/
Regarding the wick material, which I believe is actually fiberglass, it’s strange that it broke up on you. Being sandwiched between the burner bell the outer cup there really shouldn’t be any way to contact it directly. I disassembled my Omnifuel II to adapt it to a Trangia 25 cookset, which exposed the wick but it still held together. If it ever crumbles I’ll replace it with carbon felt.
LikeLiked by 1 person
Great info. Thanks.
LikeLike
@tekkster Thanks! I checked my photos and found that the deformation was caused by a 30~40 mins simmering a bannock, first burn. The spreader spring force the burner bell deformed till the spring had no tension could force it. Deformation of my burner bell is much worse then Ron point out in the CCS forum. — half round deformed and higher, another half round had be bigger and lower, The top of the burner is fully biased to one side. It still can work but it hard to said nothing affected. I think its a totally mistake by the factory, they should know that force the brass will deform it when burning.
I bought the stove at Amazon.com, I found at least 3 guys had the same situation in the reviews, and 2 guys had got a replacement from the factory. So I’d send an e-mail to Primus too in Thursday, no reply yet, I hope they will deliver promise what they said on the warranty and their website.
I buy it for preparing my long-distance bicycle tour cross Europe and Asian, before that I’d bought / used some Primus gear for long time, so thats really disappointed.
my network not very well now, I’ll upload some pics soon.
LikeLiked by 1 person
Ron – Thanks! Thats a great info, maybe mine is much worse than that fellow shows on the CCS forum, because I bought a OmniFuel II, new design had a spring on spreader. So it constantly pulling the burner bell. You can see the last comment I writte to Tekkster.
The preheating pad, when I first disassembled the stove, I feel it become fragile, and it have a crack in middle, then it cameout itself. After assembled it and used several times, it broken inside the stove, so disassembled second times, it smashed.
I found a Fe-Cr-Ai metal fiber pad, use in the industry to filter dust. I will look to see if it is a good substitute. When cycling cross several coutries, may require frequent maintenance of the stove. Last year I travel past Cambodjia and Vietnam, I noticed a lot of visible impurities in the gasoline sold in the countryside.
LikeLiked by 1 person
Hi BC, I think I understand the problem now.
Normally, the deformation is minor, because the brass bell deforms rather slowly with very little force in any direction.
But in your discovery, the Omnifuel II’s new design results in the splash guard having directional force. Because two of the three prongs are hooked, and the third prong pulls away, and there is a spring that is constantly pulling on that third prong, this creates directional force.
As the brass bell heats up and softens, the bell begins to yield to the directional force of the third prong pulling on the two hooked prongs, which more dramatically warps the bell.
This is a very serious problem!
And this also explains why I never come across this issue. You see, I don’t use the splash guard (except in initial testing as in the pictures above).
I use the Quietstove 207 silent burner because I prefer a quieter burn.
I will make adjustments to my review as this is an unacceptable flaw in the design.
Thank you for following up and keeping me informed.
Best regards,
Tetsu
LikeLike
Hi Tetsu! Yes, that’s the meaning. Normally just like that fellow show out on the CCS forum, or more minor.
Thats did a serious problem, someone left comment on Amazon.com said the recently models is too tight. I don’t know he means all the OmniFuel II or a number of Omni Fuel II is. Actually the factory could check much more carefully, the flame – spreader just need to sit on the burner, but not force to it.
But the problems is now the deformation not Im use a pliers at home could pull it back, maybe a professional coppersmith could do it, because the top of burner is totally slanting.
I just worrying about if the factory will deliver warranty, they print every languages on the warranty card, said worldwide and lifetime, and will reply your claim without 3 days, but actually they didn’t reply me at once. if the e-mail just like a stone into the sea, I did have no way.
LikeLiked by 1 person
I am so sorry to hear that.
I have, in the past, contacted Primus, MSR, and JetBoil for issues and did not have the difficulty in getting a response you are experiencing.
The only company I used to have customer service problems with was Optimus, but that was many years ago.
I genuinely hope that Primus responds to you and resolves your issue quickly. They should either send you a replacement bell, or they should send you a pre-paid delivery sticker with RMA# so you can send it back and they can process and return to you.
LikeLike
Thanks Tetsu! Yes, as all we know Primus selling on a top price. I think even the bottom price manufacturer — like Brs & Bullin will respond this issue quickly. So I hard to have no doubt of them. I don’t know whether I send a wrong e-mail address, I send the e-mail to this — ‘expeditionsservice@primus.se’, because the warranty card in the box wrrote this address. So, I hope they will resolves this problem quickly too, thats hard to find a coppersmith now, and you don’t know whether the coppersmith would like to help you.
Actually, the stove in my hands had lots issues, one leg not vertical, the shell is not level, and the grease is broken when it new in box. I had never hope the workmanship of the stove like a Philwood or DuraAce, but for the price at least it should be a Shimano XT. the one I got just looks like 3 $ rear derailleur with no name and don’t know where it made.
LikeLiked by 1 person
Hi Tetsu!
I upload some photos on the Google Pics, here is the link https://goo.gl/photos/gfJDsWmsHuzMKkXE9
LikeLiked by 1 person
Oh, that is definitely as bad as your explanation.
May I add those photos to my Omnifuel II review? I will credit you as the source, of course (and also anyone reading the comments would also see).
LikeLike
Wow! That really is bad. Unacceptable. Certainly hope Primus makes good on this.
LikeLiked by 1 person
Hey Tetsu. Yes you can. Thanks, please feel free.
LikeLike
I spoke with a Primus rep today, and he said that they corrected the design by lowering the spring tension. Didn’t give me a date when the change happened, but assured me if I bought from Primus directly, it’d be the newest, fixed version.
LikeLiked by 1 person
That is excellent news!
Thank you for the information.
I wonder if they’ll do a recall, or possible send out replacement springs.
I’ll have to call and ask.
LikeLike
Hi Tetsu! And other folks caring about this issues of our stove.
Finally, I recived the replacement part shipped form Sweden Primus’ base. They send me a new brass burner core and the new designed flame spreader. Till now, I replaced them and burned about 40 ml whitegas ( two meal ) , still working perfectly, no more gasoline I had. So I’ll keep on to observe the situation and reported. I think the new designed spreader will not have that problems anymore, now the spring has no pressure to the brass burner again.
Here is the explain e-mail from Primus —
From: Erik Wiren
Hi Chan,
Now it arrived.
Some of the stoves in the first batch had this problem with a spring that put too much pressure on the burner.
We have now redesigned the flame spreader so that it snaps on with all three legs, and that releases the pressure.
So, Im that unlucky guy, I got the first batch, and the problem one from amazon. If you now take a look at the primus’ website, you’ll noticed the flame spreader in Omnifuel ll ‘s page is changed, different to the first one I got and Tetsu show on this review.
About the customer service — Primus seems didn’t have a good e-mailbox or maybe their e-mailbox has exploded, several e-mail I send they didn’t recived any. Finally I make a call to, Wiren answered the phone ( the man above, customer service manager of primus ), kind and gentle solved the issues. Phone at Jan 17, placement part shipped form 18.
So, I’ll upload the new pics as soon as I can, and written a complete open box review.
What I think is, as a adventure tool, you did can not force the stove 100% working well anytime. More money is paying for the customer service and the company’s attitude towards their products, primus did good in this aspect. Ye, but is the time to upgrade the e-mail box. 😂😂
LikeLiked by 1 person
Thank you BC. Yes, please send photos of the new version. I’m looking forward to seeing how the product has changed up close.
LikeLike
Something I’ve noticed between the omnifuel 1 and 2 is where the valve is. On the 2 it is against a leg which is much better. On the 1 if using a wind guard the split is placed around the valve. Then if a pot is put on and the handle is placed into the slit the cooker becomes unstable and prone to tipping.
LikeLiked by 1 person
Nice detailed observation. Thanks.
LikeLike
“Original” or first Omnifuel stove had a more bell shape body:

Omnifuel that is denoted “Original” on this review would be a version 2 (flame spreader has a securing ring) . Omnifuel that has jets screwed onto one leg would be a version 3 (flame spreader has a securing spring). In “Original” or first Omnifuel flame spreader just “snaps’ onto burner bell and no ring nor spring for securing it.
LikeLiked by 1 person
According to the listed weights for the omnifuel2+pump, it seems that the pump is different from the one on the omnilite ti? I’m trying to decide between purchasing the omnilite or the omnifuel2. I’m leaning towards the larger burner and tougher legs of the omnifuel2, though I’m not sure the burner is really all that much bigger. I would like to be able to support a 4L pot. Thanks again for your blog!
LikeLiked by 1 person
Hi Kin, I think you’re right. If you want to support a 4L pot, the Omnifuel 2 is structurally better. I might suggest that the previous generation Omnifuel is even better than that because it uses a thicker gauge steel.
The Omnilite is really for lighter loads. It does have the advantage of being more fuel efficient, but as you surmised, the titanium legs are likely not up to par for heavier pot cooking.
LikeLiked by 1 person